
Creating your own Rust server is a great way to customize your gaming experience and host matches with friends or the community.
Private servers let you control settings, experiment with mods, or set up creative scenarios. While the process may seem intimidating at first, this guide will walk you through the important steps for setting up a Rust server.
Important Points
- In Rust, you can create your own server.
- Creating your own Rust server is not easy but it is also not impossible. Just follow the steps detailed in this guide.
System Requirements for Rust Server Hosting
Before getting into setup, make sure your system meets the minimum requirements for hosting a Rust server. Running a server alongside a game can be resource intensive, so it is recommended to use a dedicated machine if possible.
Minimum Requirements
- Processor: Quad-core (for example, Intel i5 or better).
- RAM: minimum 8GB; 16 GB is recommended for larger servers.
- Storage: At least 20 GB of free space.
- Network: Stable internet connection with good upload speed (10 Mbps or higher for more players).
For larger public servers, consider renting a dedicated server from a hosting provider.
Step 1: Install SteamCMD
SteamCMD is a Valve command line tool used to install and update Steam-based game servers.
Steps to Install SteamCMD:
- Download SteamCMD:
Visit the SteamCMD download page and download the version for your operating system. - SteamCMD Extract:
- On Windows: Extract the downloaded .zip file to a folder (for example, C:\steamcmd).
- On Linux: Extract the files using a terminal command such as tar -xvzf steamcmd_linux.tar.gz.
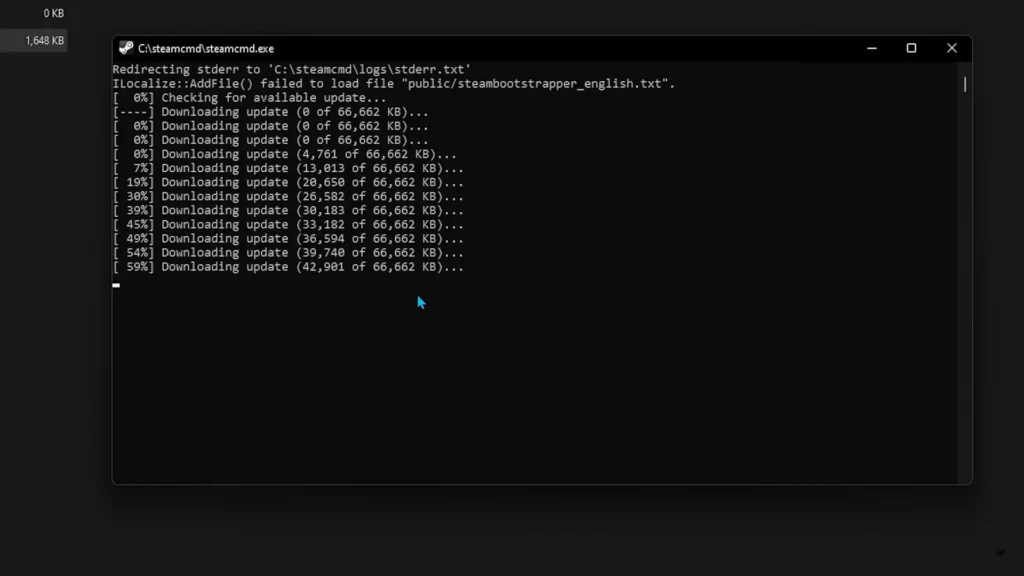
- Run SteamCMD:
Launch steamcmd.exe (Windows) or ./steamcmd (Linux). Allow it to update itself on first run.
Step 2: Download Rust Server Files
Once SteamCMD is installed, you can use it to download the necessary server files.
Ladder:
- Open SteamCMD and log in anonymously: anonymous login
- Set the installation directory for your server files: force_install_dir C:\rustserver
- Download Rust Dedicated Server file: app_update 258550 validation
This command downloads the latest version of the Rust server files to the directory you specify.
Step 3: Configure Your Rust Server
After downloading the server file, you need to configure your server settings.
Ladder:
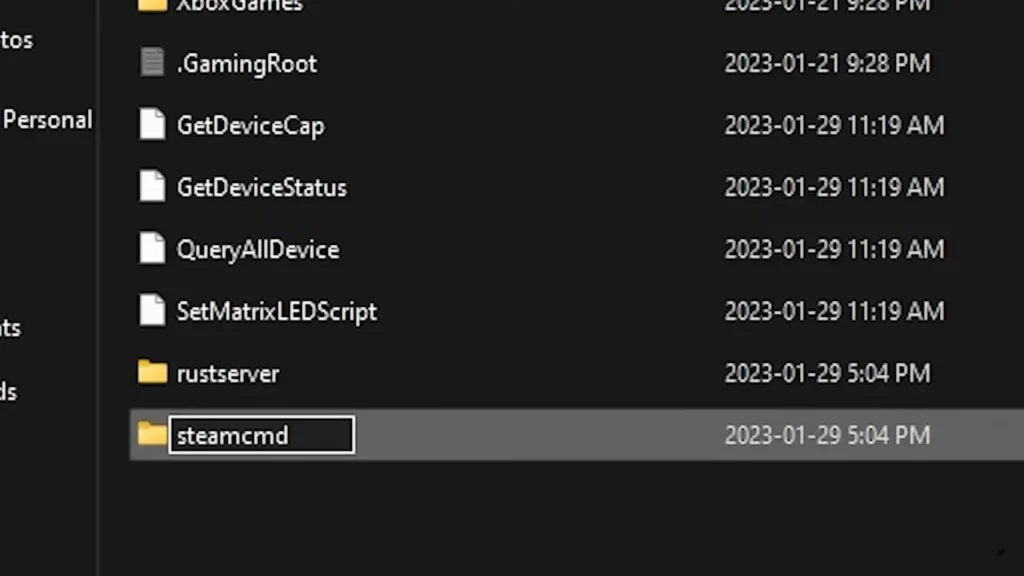
- Navigate to your server directory (for example, C:\rustserver).
- Locate the start.bat (Windows) or start.sh (Linux) file. If there isn’t one, create one.
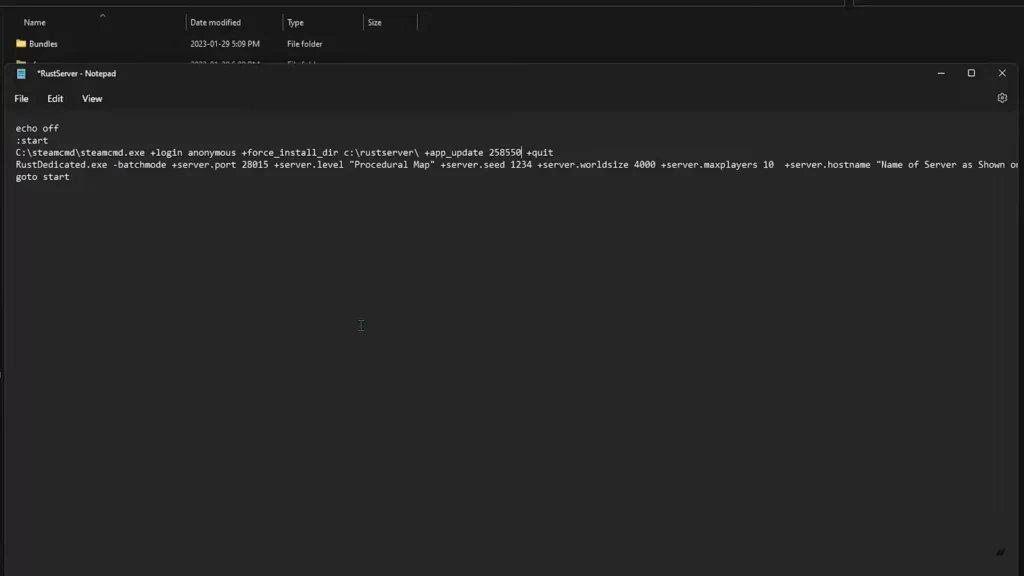
- Edit the file with the following basic configuration:
Windows Example (start.bat)
@echo off
RustDedicated.exe -batchmode +server.port 28015 +server.level “Procedural Map” +server.seed 12345 +server.worldsize 4000 +server.maxplayers 50 +server.hostname “My Rust Server” +server.description “Welcome to my Server rust!” +server.identity “rust_server” +rcon.port 28016 +rcon.password “your password”
pause
Linux example (start.sh)
./RustDedicated -batchmode +server.port 28015 +server.level “Procedural Map” +server.seed 12345 +server.worldsize 4000 +server.maxplayers 50 +server.hostname “My Rust Server” +server.description “Welcome to my Server rust!” +server.identity “rust_server” +rcon.port 28016 +rcon.password “your password”
Main Parameters
- +server.port: The port your server will run on (default is 28015).
- +server.level: Map type (for example, “Procedural Map” or “Hapis Island”).
- +server.seed: Controls the randomness of map generation. Changing this will create a different map.
- +server.worldsize: Map size (default is 4000; max is 6000).
- +server.maxplayers: The maximum number of players allowed on the server.
- +server.hostname: The name displayed in the server browser.
- +server.description: A short description displayed in the server browser.
Step 4: Port Forwarding
To allow players to connect to your server, you must enable port forwarding on your router.
Ladder:
- Log in to your router’s admin page (usually at 192.168.0.1 or 192.168.1.1).
- Find it Port Forwarding part.
- Forward the following port to your server’s local IP address:
- 28015 (Gaming Harbor)
- 28016 (RCON)
Check the specific guide for your router model if you’re not sure how to set it up.
Step 5: Run Your Rust Server
Once everything is configured, start your server:
- window: Double-click start.bat.
- Linux: Run start.sh using terminal.
Your server will launch, and you can check the console for status updates.
Step 6: Customize Further with Plugins (Optional)
For more advanced features, you can use plugins via the Oxide modding framework. Oxide lets you install mods for server management, gameplay customization, and more.
Steps to Install Oxide:
- Download the latest version of Oxide from umod.org.
- Extract and overwrite the files in your server directory.
- Restart your server.
- Browse and install plugins from the uMod website to upgrade your server.
Tips for Managing Your Rust Server
Here are some tips for managing your Rust server:
- Reserve: Back up your server files regularly and preserve data to prevent loss in the event of a crash or update.
- Monitoring: Use tools like RCON software to manage players, monitor activity and enforce rules remotely.
- Community Rules and Management: Set clear server rules and maintain active communication to foster a positive community.
Summary
Setting up a Rust server may require some initial effort, but the rewards are worth it. Whether you want to host a custom game for friends or build a thriving public community, a dedicated server gives you complete control over the Rust experience.
Frequently Asked Questions
Yes, you can. Just follow the steps mentioned in this guide.
It depends on your server hosting provider.
Gaming
A gaming hub can refer to a central platform or space dedicated to gaming, where players can access games, interact with other gamers, and enjoy related content.
Comments are closed, but trackbacks and pingbacks are open.